Punch mitts are used to assist in training especially in sparring to help the boxer develop good punch combos and defensive movements, making the punch mitt training a critical step in learning. Punch mitt training has become a common practice, throughout boxing and martial arts games as it allows you to practice real actions. Punch mitts like the punch bag or heavy bag can’t be hanged by the ceiling so, one must hold them for the boxer to practice. Holding the punch mitts is an art and must be learned and practiced. Here we provide seven core ideas to create a wonderful mitt-work training.
Check out our Coaching Equipment!.
1. Consider the Objectives/Goals of the Puncher
To begin any particular training, you must set particular goals. Discuss the upcoming training goals with your boxer before starting the training session. Punch mitts present far more training maneuvers than the heavy bag. You can target your focus on rhythm and precision or defensive drills or maintaining balance or feigning your enemy. Setting the aims with your partners makes it easy for both the fighter and the coach to set the tone for mitt work training. As mitt training cannot be performed alone, your partner needs to know the goals you have to achieve. This would pave the path to obtain the required expectations from the drill sessions.
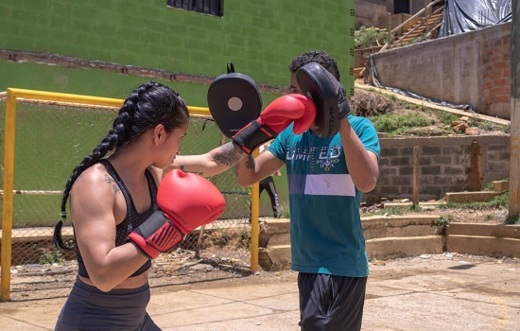
2. Position of the Mitts is Crucial
The holding position of the punch mitts matters a lot to properly assist the fighter to equip with a particular skill for an actual match. The position of the mitts must propel the boxer to act to the fullest against the opponent. Place your mitts close to your body outline, although you would be more comfortable with the mitts away from your body and the face it would not give your boxer the best training opportunity. Manage to keep your elbows in close proximity with your body.
• Mitt position for a Straight Punch
Position the pad at the height of the forehead, just to either side of your head. Keep a distance of few inches at the front. Keep the angle of the mitt slightly inward.
• Mitt position for a Hook
Keep the mitt perpendicular to your torso by turning it inwards. Grasp the pad at the eye height for headshots and the height of the spine for the blows to the torso.
• Mitt position for Uppercut
For uppercuts, keep the mitt pad facing the floor with keeping an angle slightly up. The height should be at the chin.
3. Repel back in Response to the Punch
Receiving the punch on the mitts requires you to push back against the incoming force of the punch. You cannot drop your arm while holding the pad to the incoming blow. The force from the hit would distort your arm position and will push it back. You need to keep your muscles of the arm strain along with your elbow and shoulders. Put some stress on the boxer’s joints through the mitt pads by keeping them firm. Confront every blow with resistance, which can be achieved by putting in some force against the punch. You may also need to move forward a few inches to create a pushback for the incoming hit. Repelling act also saves both your and the boxer’s joints from any injury. It also creates a rhythm in the movements of the boxer’s punch and the mitts. Also, the boxer would experience concrete feedback.
4. Form a stable and flexible stance
During the mitt drill, you hold the mitts up with feet fixed to the ground waiting for the incoming punch, and then respond to it. To launch a reaction, you must be in the right posture to absorb the effect of the incoming hit. A boxer while throwing blows does not just use his hands and arms rather utilizes the momentum of the whole body. Similarly, you have to utilize your whole body to react to the incoming force along with your hands and arms. A stabilized reaction is only possible by getting yourself into a comfortable stance. Keep your body balanced and ready for each incoming effect. A firm fighting posture provides that stability and keeps you flexible to swirl around in any direction.
5. Bring your boxer into Action
Using the mitt training you have the advantage to move around the ring unlike that of the heavy bag training which keeps a boxer stationary. After you and your boxer get warmed up, force your fighter to use his feet by moving yours. You have the free space all around to move and use your footwork. Initially force your boxer to step back by moving forward. Then swirl to either side, to simulate your fighter. Take a step back to make him move forward. Mix various footwork drills to develop movements in your fighter.
6. Advise your Boxer
Mitt pads must be utilized to enhance your boxer’s defense and offense. Keep the observations and suggestions at the end of the training sessions, but keep advising your fighter about the shortcomings during the whole session. Keep a keen eye on the areas that need improvement in your fighter and then counsel him about those shortcomings.
7. Challenge your Fighter by Altering Speed
The whole mitt training is controlled by you so, make good use of that control during the training. While holding the pads you control the rhythm of the training. Alter your speed as required to create a sense of competition in your boxer. In the beginning keep the speed at a slow pace, to get warmed up. Make adjustments to your distance and position. When you and your fighter get synchronized now, develop a full-speed co-relation between yourselves. Vary the speed and analyze the areas where your boxer needs enhancement. Adjusting the speed, up or down enables you to interpret the shortcomings in the movements of your fighter and moreover, it would keep you both challenging.
Keynote: Mitt training enables one to practice a realistic fighting tactic without having to actually fight a real person. Following these tips, you would be able to coach your fighter to an advanced level although you may not get perfect results initially but perfection requires time and consistency.
Want to learn more? Sign up for our NEWSLETTER below and start receiving more Tips & Info by E-Mail.